
Removing wall plugs can feel tricky, especially if you want to avoid damaging your walls in the process. Many UK homeowners face this problem when redecorating, moving furniture, or simply updating the look of their home. Whether you are dealing with plastic wall plugs in plasterboard or rawl plugs in brickwork, knowing the right techniques and tools can save you both time and costly repairs. By following safe wall anchor techniques and using proper DIY handyman tips, you can make the job quick and easy while leaving your walls looking fresh. At U Shaped Sofa Store, we understand how important a flawless home interior is, which is why we also provide stylish and comfortable sofas to complement your newly refreshed living space.
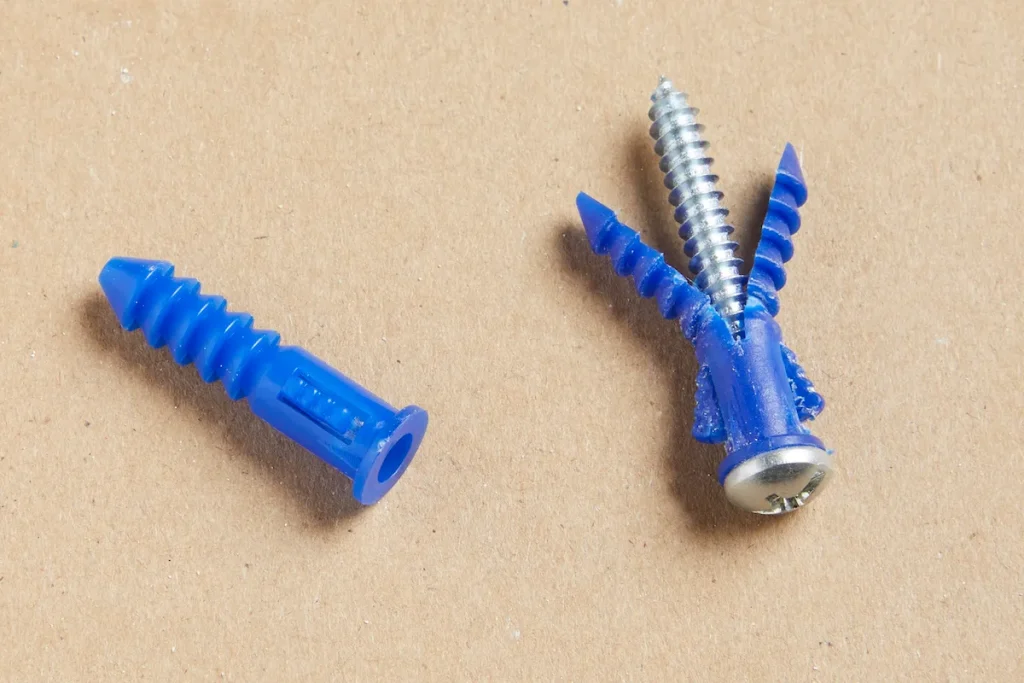
Wall plugs, also called rawl plugs or screw anchors, are small inserts designed to hold screws securely in walls made from materials like plaster, brick, or concrete. They expand when a screw is driven into them, creating a strong grip that keeps items such as shelves, mirrors, or frames firmly attached. In UK homes, plastic wall plug solutions are the most common, especially in plasterboard, but metal and nylon versions are also widely used. Knowing the type of plug you have is important before attempting removal because different materials require slightly different techniques.
In most UK properties, you will encounter a few main types of wall plugs. Plastic wall plugs are the most common for general household fittings, offering reliable support for light to medium loads. Metal wall anchors are stronger and often used for heavy items such as radiators or large shelving units. Cavity wall plugs are designed for hollow walls and expand behind the surface for a secure hold. Finally, there are specialist rawl plugs for masonry walls, which grip tightly into brick or concrete. Identifying your plug type before removal is one of the most important wall anchor removal tips because using the wrong method can damage the surrounding plaster or paintwork.
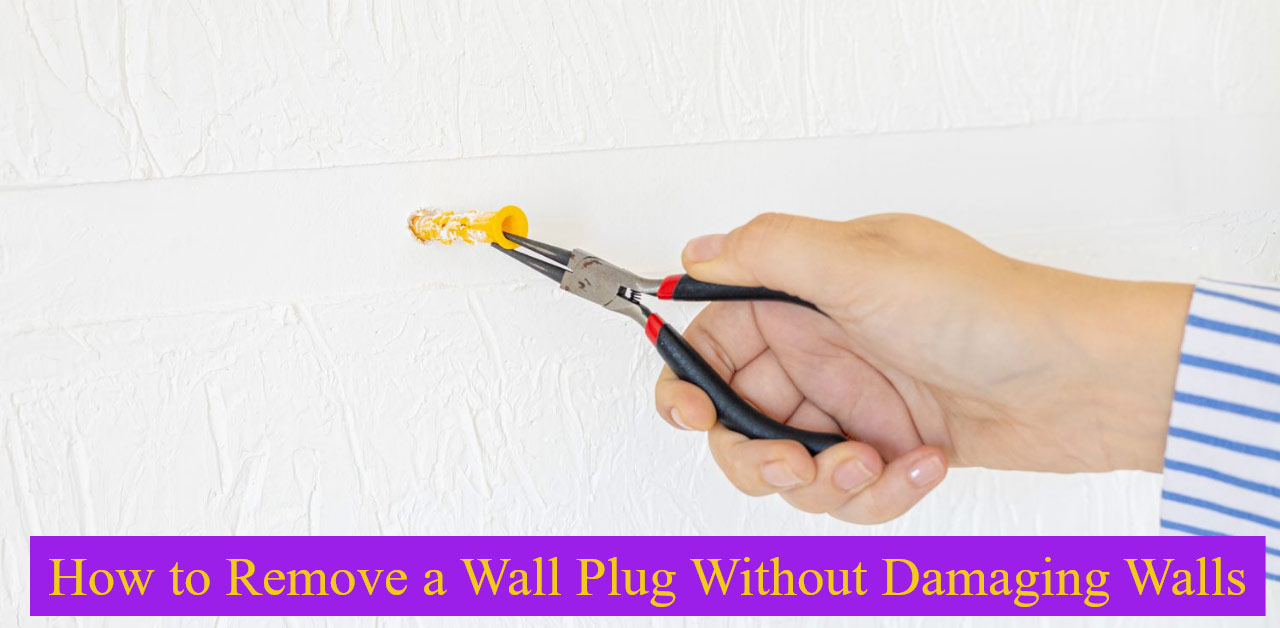
Before starting, make sure you have the right tools for removing plugs. In most cases, you will need a screwdriver, pliers, and possibly a drill with the correct bit size. A flathead screwdriver can be used to gently lever out a plug, while needle-nose pliers are perfect for gripping and twisting stubborn plugs. A utility knife can also be helpful for trimming any protruding plastic after removal. For masonry plugs, a small masonry drill bit can help loosen the plug without widening the hole too much. In the UK, brands like Stanley, Draper, and Silverline are widely available and offer reliable, affordable options. Having the right tools on hand makes easy screw plug removal much simpler.
Rushing into wall plug removal without preparation can cause unnecessary wall damage. Before starting, clear the area around the plug and make sure you have protective sheets on the floor to catch dust and debris. Wearing safety glasses is also recommended when working with masonry walls to avoid dust getting into your eyes. If you are removing rawl plugs from painted walls, score lightly around the plug with a craft knife to prevent chipping. Preparing properly is part of safe wall anchor techniques and ensures you will not create a bigger repair job than necessary.
Plastic wall plugs are the easiest to remove if you follow a careful process. Start by checking if the plug is flush with the wall or sticking out. If it is protruding, grip it firmly with pliers and twist while gently pulling outward. This movement helps break the grip inside the wall. If the plug is recessed or flush, insert a screw partially into it and use the screw head to pull the plug out using pliers. This is one of the simplest and most effective plastic wall plug solutions, especially in plasterboard walls. Avoid excessive force as this can enlarge the hole and make DIY wall repair more difficult later.
For stubborn wall plugs that refuse to come out, the screw method works well. Insert a screw into the plug, leaving about 1cm of the screw protruding. Use pliers or a claw hammer to lever against a small block of wood placed on the wall surface to protect it from marks. This method uses leverage rather than force, reducing the risk of damaging the wall. It is a great example of combining tools for removing plugs with simple DIY handyman tips to get professional results at home.
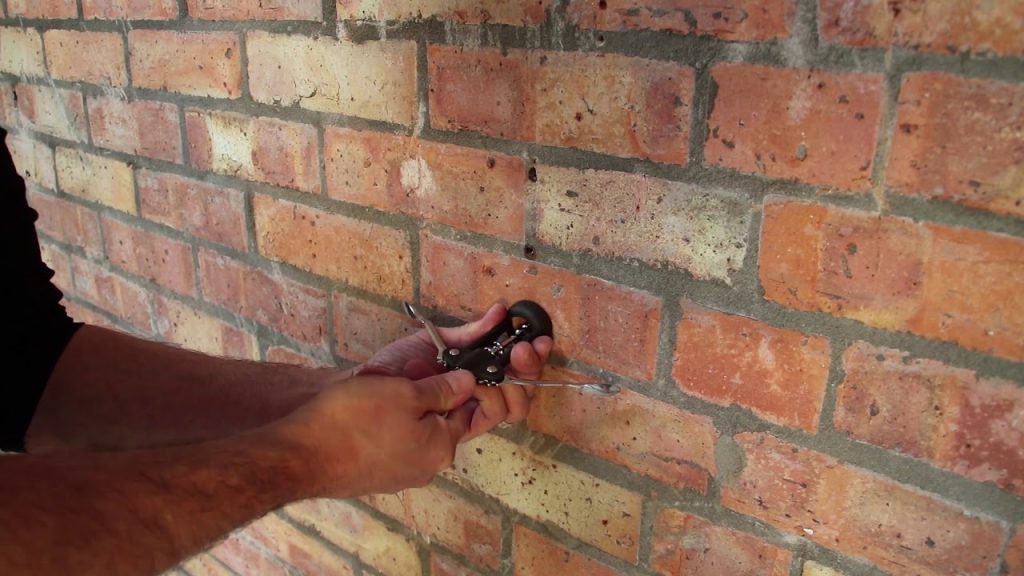
When working with brick or masonry, extra care is needed to avoid chipping or crumbling the wall surface. Start by inserting a screw into the plug and pulling gently with pliers. If it resists, use a small masonry drill bit to loosen the plug inside the hole. The aim is to reduce its grip without enlarging the hole unnecessarily. If the plug is very tight, you can collapse it inward by drilling into the centre, which will allow it to come out in pieces. This technique is widely used in DIY wall repair and is one of the safest wall anchor removal tips for older UK properties where plaster may already be fragile.
Older plaster walls can be delicate, especially in period UK homes. Before removing rawl plugs, check for cracks or signs of weakness around the plug. Using minimal force is crucial to avoid making the hole larger. If you suspect the plaster is weak, consider cutting around the plug with a craft knife before removal to prevent tearing. For very fragile areas, you may decide to leave the plug in place and fill over it, which is sometimes the best option when patching walls after plug removal.
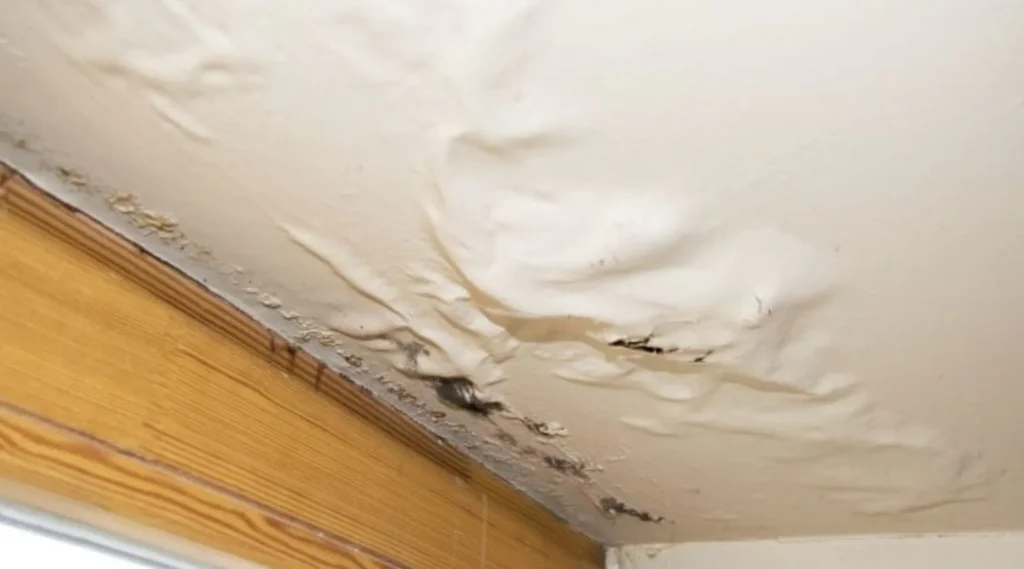
Once the plug is removed, you will likely have a small hole that needs repairing. Fixing holes in plaster is a straightforward DIY job if you follow the correct steps. Start by cleaning the hole of dust and debris, then apply a ready-mixed filler using a filling knife. Smooth it level with the wall surface and allow it to dry completely before sanding. For painted walls, you can then touch up the area with matching paint. This process not only restores the wall’s appearance but also strengthens it for future fittings.
When patching walls after plug removal, choosing the right filler makes a big difference to the finish. For small holes in plasterboard, lightweight filler is easy to use and sands smoothly. For masonry walls, a stronger filler such as polyfilla for masonry ensures a solid repair. In bathrooms or kitchens where moisture is a factor, opt for a water-resistant filler to prevent deterioration over time. Having the correct product on hand is one of the most overlooked DIY handyman tips for home maintenance.
If you plan to reinstall items on your walls, consider alternative fixing methods that cause less damage. Adhesive hooks, picture hanging strips, or specialist removable wall fixings can provide strong support without the need for wall plugs. When wall plugs are necessary, always match the plug size and type to the wall material. This approach not only makes future removal easier but also reduces the risk of large repairs.
Many people damage their walls by pulling too hard, using the wrong tools, or not preparing properly before removal. Avoid forcing the plug out at awkward angles, which can tear plaster or chip paint. Always use tools for removing plugs correctly and take your time. A careful, methodical approach is the key to easy screw plug removal without costly repairs.
Safe wall anchor techniques include gently twisting the plug with pliers or using a partially inserted screw to pull it out carefully to avoid damaging plaster walls
Insert a screw into the rawl plug and pull gently with pliers; if stubborn, use a drill to loosen the plug inside before removal
Plastic wall plugs usually require at least pliers or a screwdriver for easy screw plug removal, but in some cases, gentle twisting by hand may work
Basic tools include pliers, a screwdriver, a utility knife, and for masonry plugs, a drill with the right bit for easy screw plug removal
Clean the hole, apply ready-mixed filler with a filling knife, smooth it level, let it dry, then sand and repaint for a smooth finish
Score around the plug with a craft knife before removal to prevent chipping and use minimal force on fragile plaster
Try inserting a screw partially and use pliers to pull it out; if still stuck, use a drill to break it up inside the wall carefully
Gently pull with pliers after inserting a screw or use a masonry drill bit to loosen the plug before removal to avoid wall damage
It’s best to replace wall plugs after removal as they may lose grip and compromise safety when reused
Use lightweight filler for plasterboard and stronger polyfilla for masonry walls; in moist areas, water-resistant fillers are recommended
Match the plug type and size to the wall material and consider alternative fixings like adhesive hooks for less damage
Yes, by using the screw method combined with pliers to gently pull the plug out without drilling
Prepare the area, use the right tools, work slowly to avoid wall damage, and patch holes properly after removal
Use a combination of screw insertion, pliers, and if needed, drilling to carefully loosen and extract oversized plugs
Yes, with basic DIY wall repair materials like filler and sandpaper, most UK homeowners can fix holes and repaint for a professional look
Removing wall plugs without damaging your walls is a skill that every UK homeowner or renter can master with the right knowledge. By following safe wall anchor techniques, using the correct tools, and carrying out small repairs afterwards, your walls can remain smooth and ready for redecorating. Whether you are updating your living room, rearranging furniture, or preparing to install a new luxury U sofa set from U Shaped Sofa Store, these methods will keep your home looking its best.

U shaped sofas have become an increasingly popular choice for homeowners who love modern furniture and crave extra seating space. These large, statement making pieces
A brown leather sofa is a timeless and versatile piece of furniture that exudes sophistication and comfort. Its rich earthy tones make it a standout

A blue sofa is a versatile and stylish piece of furniture. It adds character to a room and pairs well with many colours. Choosing the
Choosing the right foam for your sofa cushions can transform your sitting experience. Whether you’re buying a new sofa or replacing your current cushions, understanding