Delivery to room of your choice

Contact us on whatsapp for further details

Delivery to room of your choice

Contact us on whatsapp for further details

How to Assemble a Corner Sofa: A Complete Guide

How-to-Assemble-a-Corner-Sofa-A-Complete-Guide

Assembling a corner sofa might seem complicated, but with the right guidance, it can be simple and stress-free. Whether you’ve bought a new modular sofa or a sectional for your living room, this detailed guide will walk you through how to assemble a corner sofa easily. We’ll also cover useful tips to make sure your sofa looks perfect and lasts longer.

Why It’s Important to Assemble a Corner Sofa Properly

Correct assembly is important for both the comfort and longevity of your corner sofa. A well-assembled sofa:

  • Ensures maximum comfort.
  • Maintains the sofa’s structural integrity.
  • Prevents damage and wear over time.

Poor assembly can lead to squeaky joints, instability, and even fabric tears. Following a proper process will save you future headaches.

Tools You Might Need

Before starting, gather all the necessary tools. Some sofas come with their own tool kit, but if not, you may need:

  • A screwdriver (manual or electric)
  • Allen keys (hex keys)
  • Hammer (optional, for gentle taps)
  • Measuring tape
  • A soft cloth to avoid scratching surfaces

Having the tools ready will make the process much faster.

Unpacking and Preparing

When your sofa arrives, follow these steps:

1. Check the Boxes

Make sure you received all the boxes mentioned in the delivery note. Corner sofas usually come in multiple parts, like:

  • Left-hand section
  • Right-hand section
  • Corner piece
  • Cushions and accessories

2. Inspect for Damage

Before assembly, check each piece for any signs of damage or defects. Contact the supplier immediately if you notice anything wrong.

3. Clear Your Space

Move any furniture out of the way. Give yourself enough room to move around easily.

4. Lay Everything Out

Place each sofa piece near where it will be assembled. This makes it easier to identify each part.

How to Assemble a Corner Sofa Step-by-Step

Step 1: Attach the Feet

Many corner sofas come without the feet attached to avoid damage during transport.

  • Turn each sofa section upside down on a soft cloth.
  • Use screws or bolts provided to fix the feet.
  • Make sure they are tightly secured.

Step 2: Connect the Sections

Most corner sofas have connectors to attach each section securely.

  • Line up the connectors (hooks, brackets, or clamps).
  • Slide or snap the pieces together.
  • Make sure the pieces are tightly connected without gaps.

Tip: For modular sofas, double-check the manual to confirm the correct arrangement (especially if you can customize left or right-hand facing).

Step 3: Secure the Corner Unit

The corner piece is the main support for the structure.

  • Connect the left and right sections to the corner unit.
  • Push them together until you hear a click or feel a tight fit.

Step 4: Add Cushions and Backrests

  • Place the seat cushions first.
  • Attach the back cushions and arrange them neatly.
  • Scatter cushions (if any) can be added for extra comfort.

Step 5: Adjust and Align

Make sure all sections are aligned properly:

  • Check the seams.
  • Make sure all edges are straight.
  • Tighten any loose screws if needed.

Common Types of Corner Sofas and Assembly Tips

Modular Corner Sofa

These sofas are made of individual units that you can rearrange.

  • Great for flexible room layouts.
  • Follow the configuration guide provided.

Sectional Sofa

Fixed design with limited rearrangement.

  • Align according to the plan.
  • Check locking brackets carefully.

Reclining Corner Sofa

  • Connect recliner mechanisms properly.
  • Test all reclining functions before final placement.

How Long Does It Take to Assemble a Corner Sofa?

  • 1-2 hours for a basic sofa.
  • 2-3 hours for a complex reclining or modular model.

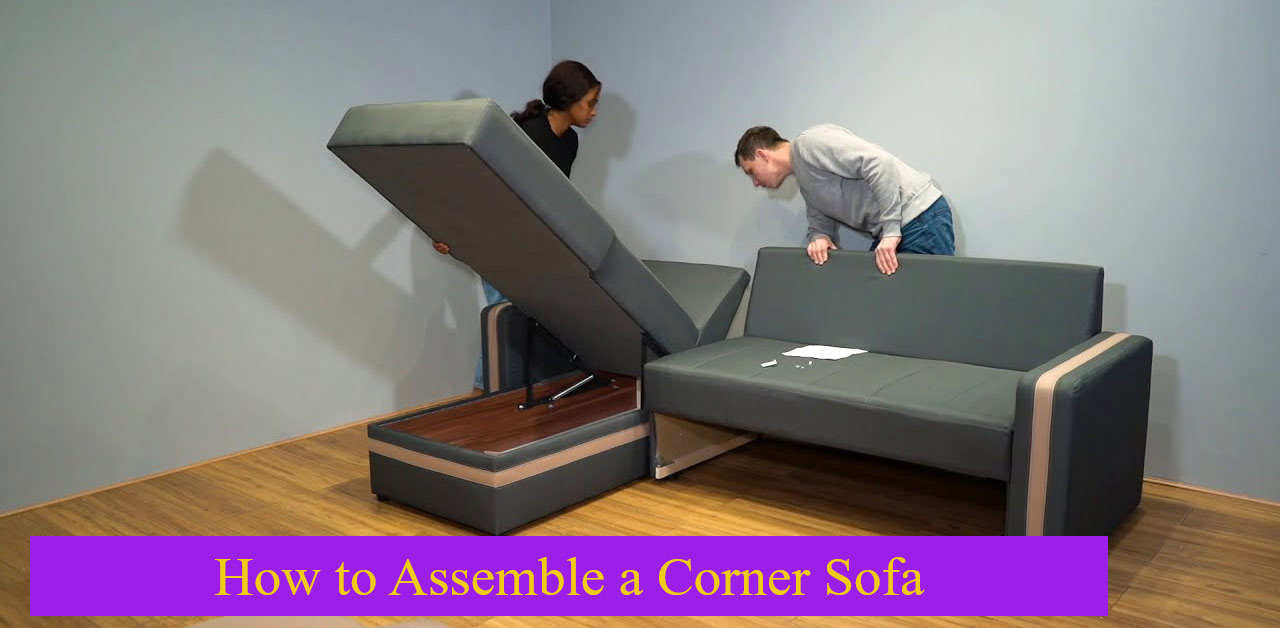
Having an extra pair of hands will make it much faster and easier.

Troubleshooting Common Problems

Problem: Sections Won’t Click Together

  • Make sure you are aligning the connectors correctly.
  • Sometimes gently lifting and repositioning helps.

Problem: Wobbly Feet

  • Tighten all screws again.
  • Check if the feet are level.

Problem: Sofa Looks Uneven

  • Place a spirit level on top.
  • Adjust feet if they are height-adjustable.

Maintenance Tips After Assembly

  • Tighten screws every 6 months.
  • Vacuum under the sofa regularly.
  • Rotate cushions for even wear.
  • Avoid jumping or heavy impact on modular parts.

The U Shaped Sofa Store’s Assembly Practical example

The hardest part of this process isn’t any single step; everything is quite hard if you’re doing it alone.
If you can, get some help — it will make it a lot easier, especially when moving the big parts.

Tools Needed

The tools needed for further assembly are packed inside one of the sofa parts, which can be opened smoothly.
Inside, you’ll find:

  • A box with all needed tools and screws.
  • I recommend opening the toolbox and placing everything inside a container so you don’t lose anything.

Pro Tip for Easier Assembly

From experience, I recommend getting:

  • An electric screwdriver or drill.
  • All kinds of bits, though some are already included in the box.

Trust me, using an electric screwdriver will make the work much easier.

Planning the Sofa Orientation

A mandatory thing you need to decide before starting is the sofa’s rotation:

  • The sofa is G-oriented, meaning you must decide if the longer part goes on the left or right.
  • In my case, when looking from the front, I want it on the left side.

So:

  • Place the correct part on the inner side of the sofa.
  • If the left side is going toward the wall, it won’t be visible.

Friendly Advice:
Be careful when opening parts sideways. They can swing open automatically and hit something.
(Trust me — it happened to me!)

Starting the Assembly

Now, let’s start assembling:

  • You have double-sided screws.
  • Tighten everything real tight at this stage.
  • Close and rotate the parts after tightening.

Installing the Backrests

You want to:

  • Take the shorter backrest and place it on the left side where the opening sofa part is.
  • Make sure the holes are facing the inside.

Then:

  • Take the longer backrest side and move it into position as well.

Assembling the Bottom Parts

Slide the opening part of the sofa into the bottom like this:

  • Take two parts and place them where the holes match up.
  • Get two of the metal bracket adapters from the box.
  • Use the provided wrench adapter (or better, your electric drill) for easier work.

Screwing the Frame Together

You need:

  • Four screws with adapters.
  • One hole is near the centre, two are in a corner, and the fourth is on the right side.

Tip:
You might need to move the back parts slightly to align the holes perfectly.

Installing the Hinges

You now need:

  • Two hinges.
  • Four smaller screws.

Find the two spots on the opening sofa part:

  • The non-rounded holes should face the outside.
  • Screw them in using a smaller screwdriver bit.

Test After Installing

After the hinges are installed, test the opening mechanism.
Everything should close smoothly.

Attaching the Top Frame

Now it’s time to:

  • Move the sofa up slightly from the wall.
  • Take the top part (without metal mechanisms) and place it on top.

Important:

  • Hinges must go on the inner side.
  • Align four holes on the bottom with the backrest.

Side Rest Installation

Take:

  • Two side rests.
  • Four large screws.

Align and screw tightly:

  • Don’t screw softly — tighten properly to avoid future cracking sounds.

Final Screwing Steps

Take:

  • Four longer screws.

Again:

  • Tighten them firmly to avoid any future loose fittings.

Result:
At this point, the sofa frame should look really good and tight.

Installing Sofa Legs

About the legs:

  • The legs are quite low, so robot vacuums may not fit underneath.
  • I will probably find a modification later for higher legs.

Now:

  • Install legs at the top and bottom side using:
    • Two flat-headed screws for each leg.

The two spots for screws are:

  • Under the opening part (middle leg).
  • Completely on the opposite side (front leg).

Always:

  • Tighten screws straight and evenly.

Installing Wheels

Take:

  • Four wheels.
  • Eight screws.

Install:

  • One wheel on each designated spot.
  • Two screws per wheel.

This is an easy and quick step.

Final Touches

When the box is empty and all parts are installed, we’re almost done!

Take:

  • The final two metal brackets and four screws.
  • Mount them in the designated spots underneath the sofa.

Pro Tip:
While pulling the sofa down, make sure to clear everything underneath.

Final Assembly: Connecting Sofa Sections

This is the moment when:

  • You pull the opening part under the main sofa frame.
  • It clicks smoothly into place.

You should:

  • Hear a satisfying click sound.
  • Test pulling it out and pushing it back.

Once done:

  • The sofa is ready to use.

Assembly Complete

Congratulations — the job is done!

Final Test:

  • Pull out the bed section.
  • Test the overall structure.

FAQs About Assembling a Corner Sofa

Q. Can I assemble a corner sofa alone?

Yes, but it’s easier with two people, especially for heavy lifting.

Q. Do I need professional help to assemble a sofa?

Most corner sofas are designed for self-assembly. Only very complex electric recliner models might need experts.

Q. Are corner sofas delivered in parts?

Yes, they usually come in sections for easier transport.

Q. How do I know which side is left or right?

When facing the sofa, the left-hand side means the chaise or longer side is on your left.

Q. What if a part is missing?

Contact customer support immediately. Most companies offer replacement parts quickly.

Final Thoughts

Assembling a corner sofa at home isn’t as hard as it seems when you follow clear steps. Take your time, double-check connections, and ask for help if needed. Whether you’re setting up a grey cord corner sofa, a modular velvet corner couch, or a large family-sized sectional, following this guide will make sure your sofa is safe, comfortable, and looking great.

Choosing a quality sofa is an investment in your home’s comfort. And assembling it the right way ensures you enjoy it for years to come.

So now that you know how to assemble a corner sofa easily, confidently set up your new cosy spot today!

Share:

Facebook
Twitter
Pinterest
LinkedIn

Leave a Reply

Your email address will not be published. Required fields are marked *

On Key

Related Posts